
REVIEW · LONDON CITY TOURS
Iconic London Landmark Photography City Tour
London turns into your photo classroom. On this private photography walk, your guide helps you shoot Big Ben, the London Eye, Millennium Bridge, St Paul’s Cathedral, and Tower Bridge with smart instruction instead of random wandering. I love that the coaching adapts to your camera, and I especially like the included e-guidebook so you keep improving after the tour. One thing to plan for, it’s a 3.5-hour walk with a moderate fitness level.
You’ll finish with coffee or tea and get tour and group photos, so you’re not just chasing landmarks. Expect a mobile ticket, a clear end point near Tower Bridge Road, and real hands-on help with framing, settings, and photo angles.
Key things I’d highlight before you go
- Private, undivided attention for your group, not a busy herd move-along
- Coaching tailored to your gear, from DSLR to smartphone tips
- A learning carry-over through a provided photography e-guidebook
- High-impact photo stops with free entry at each viewpoint on the route
- A simple finish ritual with coffee or tea to refuel and review what you shot
A 3.5-Hour Private Photo Walk That Teaches Settings, Not Just Spots
This is the kind of London tour that makes sense even if you already know the big sights. You are not paying for a checklist. You are paying for a guide who helps you turn those iconic backdrops into photos that actually look like you meant them.
What makes it work is the pairing of place and skill. You move through Westminster, the Thames, and the City of London viewpoints, while you learn practical camera technique step by step. And because it is private, the pace and teaching can match your level, whether you are starting from near zero or trying to get more control out of advanced settings.
Your biggest tradeoff is time on your feet. It runs about 3 hours 30 minutes, and it’s designed for people with a moderate physical fitness level. If you want a mostly seated sightseeing day, this one might feel like work. If you enjoy walking and learning in motion, you’ll be in your element.
You can also read our reviews of more city tours in London
Meeting Point at Caffè Nero, Then Straight Into Photo Landmarks
You meet at Caffè Nero in Portcullis House, Unit B, right by Bridge Street in Westminster. It’s a straightforward starting area, and you have an easy nearby reference point, London Bridge Underground Station is about a 10-minute walk away.
You also get a mobile ticket, which helps on a day where you might otherwise be juggling confirmations and paperwork. After that, the tour flows as a guided walk from landmark to landmark, with short time windows for shooting at each stop.
One smart thing here is the structure. The stops are close enough to keep momentum, but long enough to practice framing and camera choices. You are not just arriving and snapping. You are stopping, adjusting, and trying again, which is where real improvement happens.
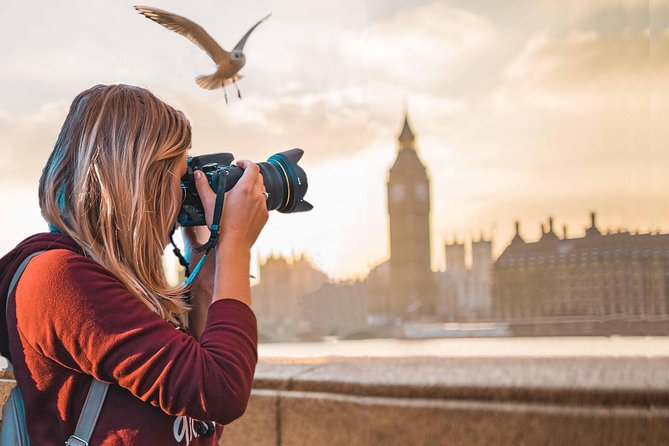
Stop at Big Ben: Your First Frame From Westminster
Big Ben is the opener, and it’s a good one because it sets your theme for the whole day: London icons, photographed with intention.
You start near Westminster Station, opposite Big Ben. There’s about 10 minutes here, and while that may sound short, it’s actually useful. When time is limited, you learn quickly what to prioritize. You can work on one or two angles and bring your settings into the game without overthinking.
Practical tip for this first stop: treat it like a warm-up round. Pick one composition you like, then make small changes. For example, adjust your angle slightly, change your focus point, or try a different exposure setting. The guide’s job is to help you see what those changes do, not just to tell you to take more photos.
The best drawback at Big Ben is the usual London reality: you’re in a crowded, famous area. Your advantage on a private tour is that your guide can steer you toward angles that feel more workable, so you spend less time fighting for a clear view.
London Eye With the Thames: Making a Tourist Shot Look Like Yours
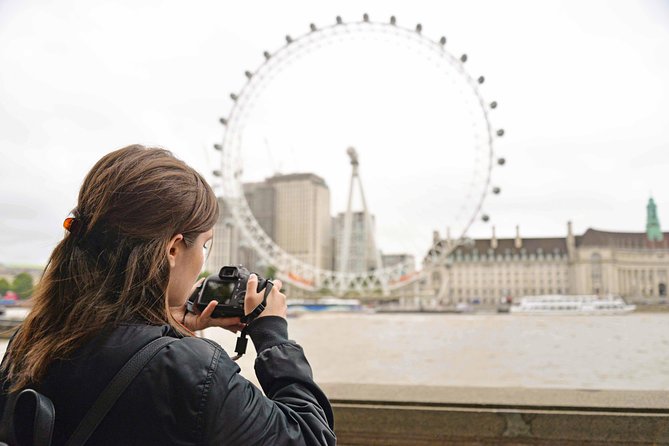
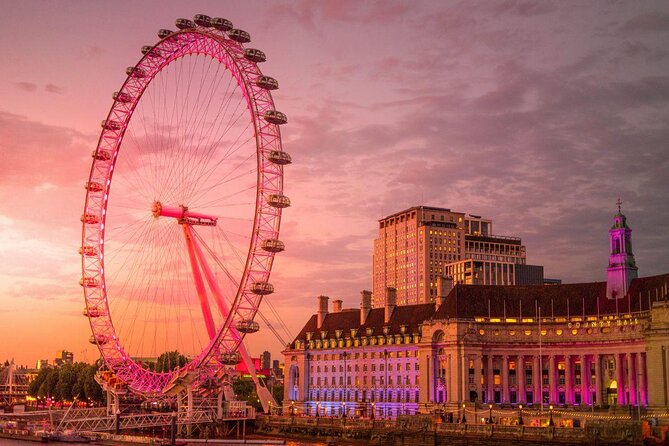
Next comes the London Eye, one of Europe’s tallest cantilevered observation wheels and also the most popular tourist attraction in the area. This is great because the landmark is dramatic, but it also can tempt you into taking the most obvious shot.
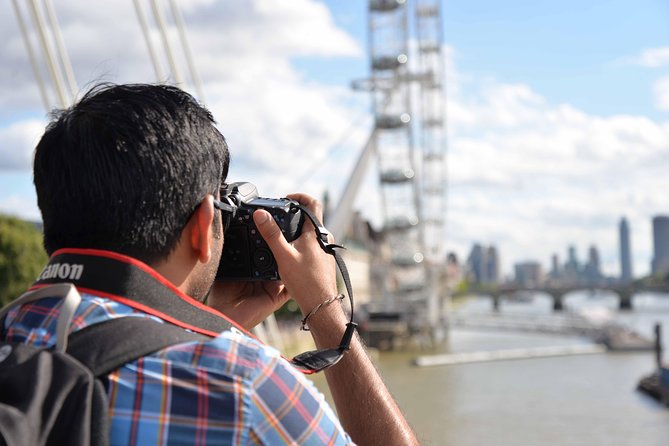
You’ll walk past the London Eye and capture photos with the Thames in the background. You get about 20 minutes here, which gives you breathing room to play with the river line, the horizon, and the relationship between the wheel and nearby structures.
If you want photos that look more like a photography project and less like a memory snapshot, focus on separation and lines. The Thames gives you a natural leading element. A slight shift in your position can change how the river flows through your frame.
Also, pay attention to how your guide adjusts teaching based on equipment. One earlier experience highlighted that the tour can focus more on professional cameras, but smartphone users still get helpful hints. So if you’re shooting with your phone, you can still get something practical out of it, like how to stabilize, how to avoid blown highlights, and how to nail a more deliberate composition.
Millennium Bridge: The City View and the Leading Lines Effect
Millennium Bridge is often photographed as a simple icon, but it’s actually a teaching stop. You get about 20 minutes here, and it’s described as London’s most iconic footbridge with stunning views of the City of London and the Thames.
This is where you can practice using lines. Bridges are made for that. The span, the railing, and the perspective toward the skyline can help your photos feel deeper and more intentional.
Here’s what you should do during your time: choose one wide composition and one tighter framing. If you shoot wide first, you can use the wider context to set the scene. Then, when you move to the tighter frame, you can experiment with your camera settings while reducing distractions.
Because this is part of a guided private walk, you are not just guessing where to stand. Your guide can show you photo spots you might not find on your own, which is a big deal when a viewpoint looks obvious but ends up being the least flattering angle.
You can also read our reviews of more historical tours in London



St Paul’s Cathedral From Two Hidden-Looking Corners
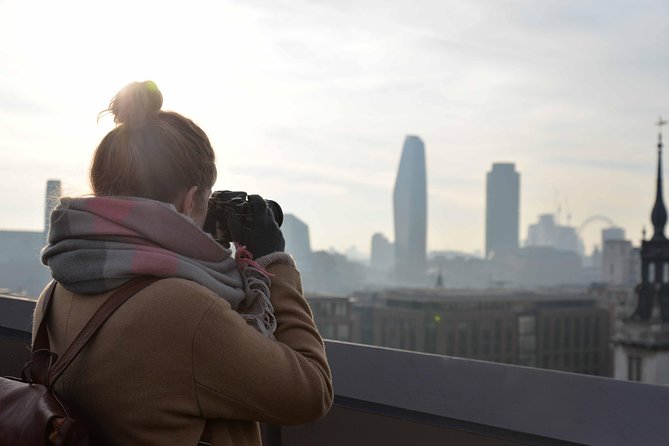
St Paul’s Cathedral is where the tour shifts from iconic skylines to more architectural, city-shaping angles. You’ll head to St Paul’s and take stunning shots from two corner viewpoints that focus on the skyline and the surrounding city look.
The tour doesn’t list exact minutes for this stop, but it’s clearly treated as a highlight and it is where you can slow down a bit, because it’s all about how you frame the building. The guide will help you position yourself for the views you want, and this is often the part where a skilled photographer stops thinking in terms of landmark photos and starts thinking in terms of geometry and spacing.
What I like about this stop is that it trains your eye beyond the obvious postcard. If you’ve ever taken one photo of a famous building and then felt like all the rest looked the same, this is the fix. Corners force you to decide what the foreground does, how the skyline layers behind, and how your subject sits inside the frame.
This stop also helps you learn how to manage city backgrounds. London has a lot going on visually. Your guide can steer you toward compositions that reduce visual clutter so St Paul’s remains the star.
Tower Bridge: Getting the Most Photogenic Angles Without Guesswork
Then you finish at Tower Bridge, and you get about 30 minutes. That extra time matters, because Tower Bridge is photo-friendly from multiple sides, but it can also overwhelm you if you don’t have a plan.
You capture Tower Bridge from its most photographic angels, which is the key phrase here. This is not random standing. It’s targeted viewing, and it’s exactly what most people miss when they self-guide.
Use the extra time in a structured way:
- Take one establishing shot so you lock in the full shape.
- Take one angled shot that emphasizes the bridge lines.
- Take one detail shot that focuses on textures, railings, or bridge structure.
If you’ve been practicing settings earlier in the walk, Tower Bridge is where you can apply what you’ve learned. You can try the adjustments you’ve been meaning to test, then see the results in a high-contrast landmark scene.
And since the tour ends near Tower Bridge Road, you’re in a convenient finish area for continuing your day on foot or popping into nearby places after you’ve wrapped up your shooting.
Coffee and Group Photos: The Best Kind of Wrap-Up
At the end, you refuel with complimentary coffee or tea. That’s a small included extra, but it matters more than it sounds. It gives you a reset after a concentrated session of walking and shooting.
You also get tour and group photos included. Even if you come for solo learning, these photos add a practical benefit: you can see how you were likely posing and framing at the stops. It’s useful reference, especially if your guide taught you to shoot from certain positions.
And there’s an emotional benefit too. When you’re learning, it’s easy to doubt yourself after a few mistakes. A guided photo session plus a low-pressure finish helps you feel like the day had a real outcome.
DSLR or Smartphone: Coaching That Actually Changes What You Shoot
One of the best reasons to book a tour like this is the equipment fit. You can bring a DSLR or a regular smartphone camera, and the coaching is tailored to your needs.
In one past experience, the guide David stood out for patient teaching and spending time with each person to give advice. The key detail there is patience and pacing. If you’ve ever taken a photo walk where the guide moves on and you’re left behind, this is not that style. You get help at your level.
For DSLR users, you’ll likely focus on learning familiar camera settings and understanding how to use them confidently. One earlier reviewer said they learned more during the 3-hour session than from a 6-month college photography course, and they specifically mentioned getting the basics and advanced settings they needed. That aligns with the tour promise of coaching that builds real competence, not just pointing at pretty scenes.
For smartphone users, you shouldn’t assume you are limited to basic tips. Another highlight is that smartphone participants still received great hints and tips. That is exactly what you want, practical guidance that helps you improve without requiring you to suddenly buy a new camera.
The biggest mindset shift you should bring is this: you are practicing. Not just sightseeing.
The Price Question: $403.77 Per Person and What You Get for It
The price is $403.77 per person, and it is booked far in advance on average, about 195 days ahead. Private photography tours tend to cost more because you are paying for one guide, teaching time, and guided positioning through multiple stops.
So what is the value? It is not the landmark sequence, since you can see these places on your own. The value is the coaching plus the time-saving benefit of getting to the better angles with a guide’s help.
You also get several inclusions that reduce add-ons:
- Photography e-guidebook for continuing practice after the tour
- Tour and group photos
- Coffee or tea at the end
You do not get transport fares like subway, bus, or taxi, so you should budget for getting yourself to the meeting point and, if needed, getting home afterward.
My practical take: if you want a normal sightseeing day, this may feel pricey. If you want skill-building and better photos, it starts to look like a focused workshop with iconic backdrops. The private element is what makes it worth it for many people, because you are not waiting for the group to catch up.
Who This Tour Is Best For (and When to Skip It)
This tour is a strong match if you want:
- A private photo walk with undivided attention
- Coaching that fits your gear, DSLR or smartphone
- Help learning camera settings in real shooting situations
- Iconic London landmarks paired with less-obvious angles
- A day that ends with a practical takeaway, the e-guidebook
It might be less ideal if:
- You hate walking and want a short, comfortable tour
- You expect a purely sightseeing experience with no hands-on learning
- You are looking for a vehicle-based or indoor-heavy itinerary
Also, be honest about your expectations. You are not being taught photography from scratch in a classroom for hours. You are learning through guided practice across London’s big photo locations.
Should You Book This Private London Photography Tour?
If you want photos that look like you planned them, this is a smart booking. The mix of landmark variety, guided angles, and coaching that fits DSLR and smartphone users makes it more than a simple sightseeing walk.
I’d book it if you’re at least a little interested in learning your camera settings, or you want structured help getting sharper results quickly. The inclusion of a photography e-guidebook is a nice signal that the goal is improvement after you get home, not just a few great shots on the day.
I’d reconsider if you want a low-effort day, or if your fitness level makes a moderate walking route uncomfortable. But if you can handle the walking, you’ll likely leave with both better images and a clearer sense of how to control your camera.
If you book, bring your camera fully charged, and come ready to try small changes during each stop. That is where the tour does its best work.
FAQ
How long is the Iconic London Landmark Photography City Tour?
It lasts about 3 hours 30 minutes.
Is this tour private or shared with other groups?
It is a private tour/activity, and only your group will participate.
What is included in the price?
The tour includes a photography e-guidebook, tour and group photos, and coffee and/or tea.
Are admission tickets required for the stops?
Admission tickets are listed as free for the stops on the route.
What camera equipment can I use?
The tour supports all levels and is described as working for both DSLR cameras and regular smartphone cameras, with coaching tailored to your needs and equipment.
Where do I meet the guide?
You meet at Caffè Nero, Unit B, Portcullis House, 1-2 Bridge St, London SW1A 2JH, UK.
Where does the tour end?
It ends at Tower Bridge Rd, London SE1 2UP, UK.
What is the cancellation policy?
You can cancel for a full refund up to 24 hours in advance. If you cancel less than 24 hours before the experience starts, the amount paid is not refunded.
More City Tours in London
More Tours in London

More Tour Reviews in London

Not for you? Here's more nearby things to do in London we have reviewed

More London City Tours worth a look.
 ★ 4.6The London Eye Entry TicketTickets from $3935,875 guest reviews
 ★ 4.7From London: Harry Potter Warner Bros Studio TourTickets from $11726,588 guest reviews
Westminster to Greenwich River Thames CruiseTickets from $2222,836 guest reviews
Magical London: Harry Potter Guided Walking TourTickets from $2022,044 guest reviews
 ★ 4.6Madame Tussauds LondonTickets from $3620,915 guest reviews
 ★ 4.5Stonehenge, Windsor Castle, and Bath from LondonTickets from $11118,662 guest reviews
 ★ 4.7Warner Bros. Studio Tour with TransfersTickets from $14417,586 guest reviews
 ★ 4.7Tower Bridge Entry TicketTickets from $2115,560 guest reviews
Continue by place or experience