
REVIEW · LONDON CITY TOURS
Night Photography Tour in London
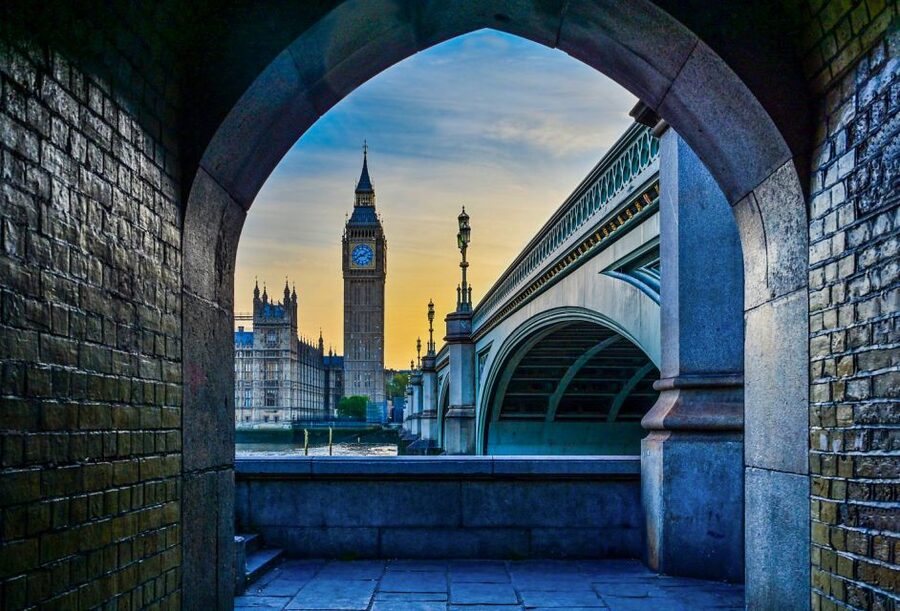
London at night turns serious fast. This 2.5-hour night photography tour gives you a friendly, hands-on guide to help you capture London’s big lights without guessing. I love how the route focuses on the best Thames-side compositions, and I especially like that coaching works for whatever you’re shooting, from DSLR and mirrorless to a smartphone. One thing to plan for: you’ll need a tripod, and if you don’t have one, you can rent one for the tour.
You’ll move at a real photo pace, hitting the river banks and several landmarks, rather than just standing in one spot hoping for magic. The vibe is practical, not tech-jargon heavy, and you get help with low light and long exposures that you can actually reuse later. If you want a relaxed stroll with zero camera pressure, this may feel like you have homework, because you will.
Overall, it’s a smart, short-night session that helps you turn London night views into pictures you’ll want to keep. If you match your expectations, you’ll leave with a clearer sense of what to shoot next time, not just a few pretty frames.
Key things I think you should know
- Tripod is required, and rental is available if needed
- Private group up to 5, so the guide can tailor the tips
- 45 minutes each at major stops, including London Eye, St Paul’s, and Tower Bridge
- Designed for low light and long exposure, with coaching that fits your skill level
- Smartphone-friendly, plus instruction for both camera and iPhone shooting
- An e-guidebook after the tour helps you keep improving
Why a 2.5-Hour Night Shoot Works So Well in London
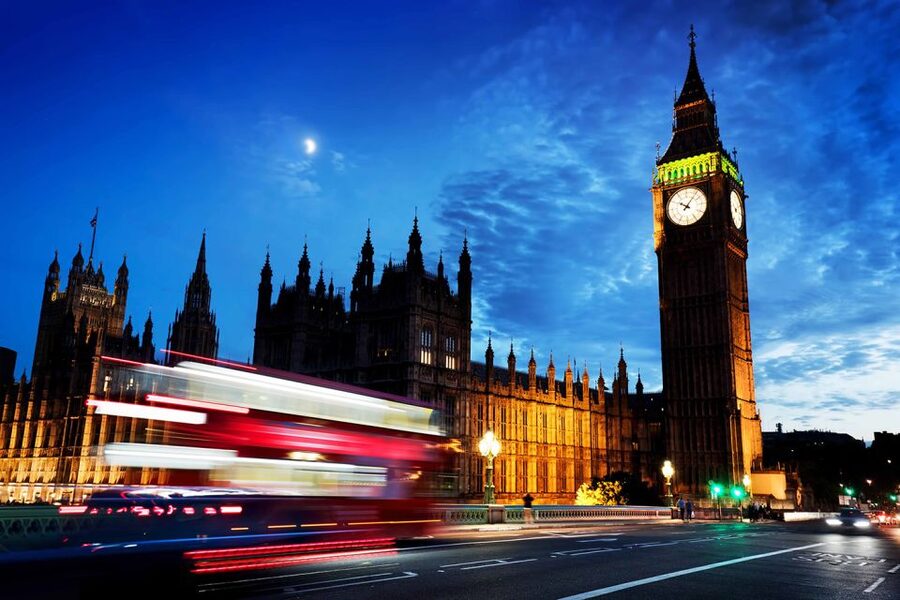
London looks different at night, and that matters for photography. Light sources become your subject, reflections get stronger, and the city’s geometry shows up in a way you can’t really copy in daylight.
This tour is timed for results. At 2.5 hours, you get multiple landmark stops, plus enough instruction to change how you shoot while you’re still in the same lighting conditions. The goal isn’t to make you an expert in a single evening, it’s to make you better by the time you reach Tower Bridge.
Also, you get a pro photographer guide, not just a group-walk. You’re there to learn low-light basics like longer shutter speeds and safer exposure choices, and you’re doing it right where the opportunities happen.
You can also read our reviews of more evening experiences in London
Meeting Outside Caffè Nero Near Westminster, Then Straight to the River
You meet outside Caffè Nero at Westminster station. That’s a convenient starting point because it puts you close to central sights and makes it easier to keep the tour tight and focused.
From there, the walk takes you across the Thames and along the river’s north and south banks. That is a big deal for night photography because your angles change with each bank. The Thames reflections can look great one direction, then dull the next, so moving makes sense.
The tour is wheelchair accessible. It also runs as a private group, so you are not stuck competing for the same photo spot.
London Eye at Night: Shooting Lights, Reflections, and Flow
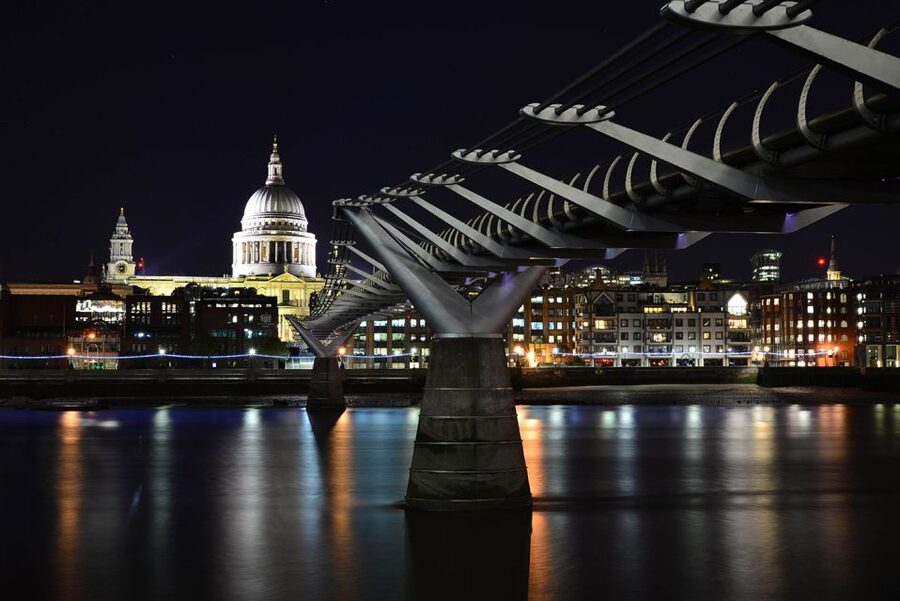
The first big photo stop is the London Eye, with around 45 minutes for photo time, sightseeing, and a class-style segment. The Eye is perfect for night practice because you have bright points of light plus a lot of nearby structure.
Here’s what the guide coaching tends to focus on in situations like this: stable framing and controlling light so it doesn’t turn into a blob. With the right approach, you can get crisp building lines while still capturing the glow and motion around the river.
You’ll also get advice that works whether you shoot a DSLR, mirrorless, or smartphone. The method may be different, but the goal is the same: keep the image sharp where you want detail, and use longer exposure effects when it improves the scene.
Practical tip: when you set up your shot, do it early at the stop. The London Eye area can be busy, and the longer you wait, the more you’ll feel rushed. A tripod helps you move from one composition to the next without fighting the camera settings every time.
St Paul’s Cathedral After Dark: Getting Crisp Results in Low Light
Next up is St Paul’s Cathedral, another roughly 45-minute stop for photography and sightseeing. St Paul’s is a strong subject at night because it gives you tall lines, dramatic lighting, and contrast against the darker sky.
This is where low-light coaching becomes extra useful. You’ll work on how to shoot in darker scenes and how to use long exposures without just overexposing everything. That means thinking about shutter speed, brightness control, and where you put your focus so the photo looks intentional, not accidental.
The cathedral also rewards patience. You can try a classic wide view, then tighten your framing for a more graphic look. With a guide on hand, you’ll get ideas for angles and compositions rather than wasting your time guessing.
A nice detail from the coaching you get: it’s not one-size-fits-all. If you’re figuring out a camera for the first time, you’ll likely get steadier steps. If you already shoot, you’ll still benefit because the guide helps you refine choices for night conditions.
Tower Bridge Finale: River Reflections and Long-Exposure Options
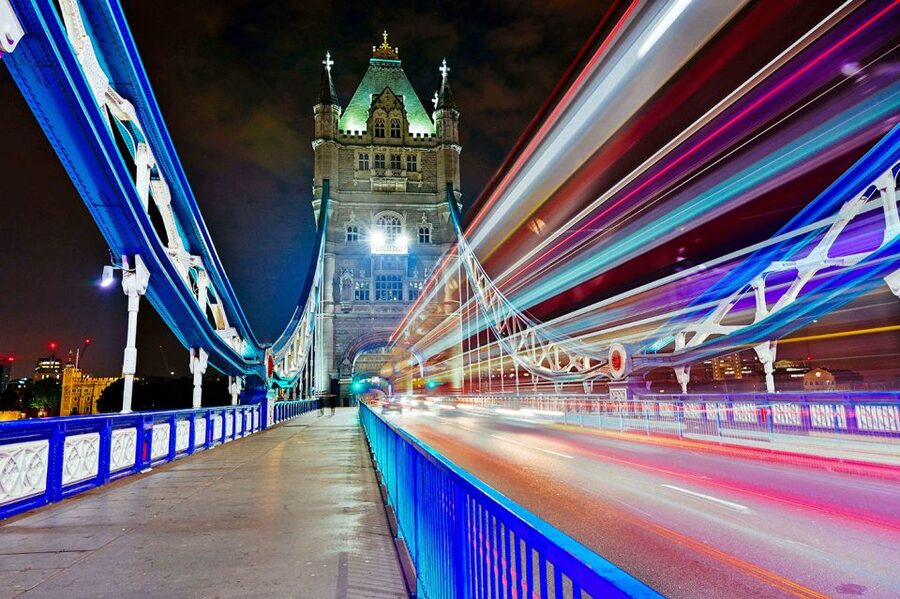
The final major stop is Tower Bridge, again about 45 minutes for photos and sightseeing. This is often the most rewarding place to practice longer exposures because you have the bridge structure, the water reflections, and lots of light sources layered together.
This stop is also where the tour’s structure pays off. By the time you reach Tower Bridge, you’ve already had instruction for low light, you’ve used the tripod, and you’ve seen how different angles change the results. That means your Tower Bridge shots can improve faster than your first London Eye frames.
Expect to work on reflections along the Thames and how the surrounding lights behave on the water. The double-decker buses and city lights can also add visual interest, especially when your shutter speed is set to capture either a calmer look or subtle motion.
One thing to note from the provided tour details: the route information says the tour ends at Tower Bridge, while the meeting info indicates it ends back at the meeting point. I’d treat Tower Bridge as your last photo anchor and confirm the exact last walk with the guide before you go.
You can also read our reviews of more photography tours in London

Gear Check: Tripod Required, Smartphones Welcome
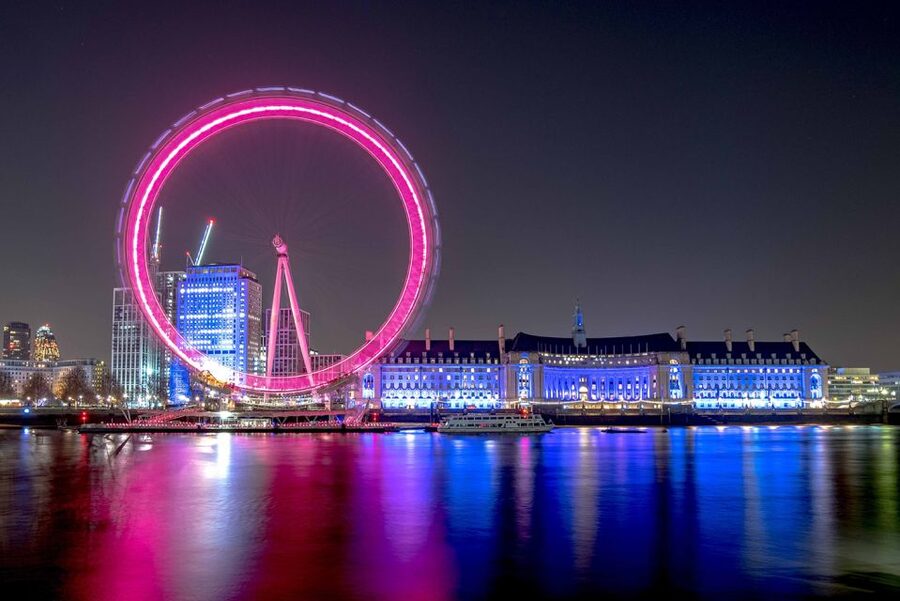
This tour is suitable for all types of digital cameras, including DSLRs, mirrorless cameras, and smartphones. That matters because many night photography experiences cater to one device. Here, the guide is set up to help you shoot the scene with what you actually own.
But there is one non-negotiable: you need a tripod. If you do not have one, you can hire the tour’s tripod for £30 for the duration of the tour.
If you’ve never used a tripod for night photography, here’s why it’s worth the effort. At night, your camera needs slower shutter speeds to gather light, and a tripod keeps the frame stable long enough for you to get sharp images. Without it, the results often look soft or blotchy even when you set the camera correctly.
If you are traveling with a smartphone only, the tripod still helps. Even if your phone has a night mode, a stable setup and good framing can improve how the light and reflections render.
Coaching That Helps You Use Your Camera Instead of Fighting It
The heart of the experience is personalized coaching from a professional photographer guide. The tour is designed for different skill levels, so you shouldn’t feel like you’re either overqualified or starting from zero.
You’ll learn how to shoot in low light and with long exposure, and you’ll get expert advice on camera settings and composition choices. The point is not memorizing numbers, it’s building confidence so you can repeat the method later.
One encouraging detail: the guide David is described as amazing and patient, and he helped someone learn their camera as well as iPhone shooting. That’s the practical mix you want on a night photo tour. You might start the evening thinking you’ll just get a few decent snaps, then realize you can control the outcome.
The coaching also seems attentive to your preferences. One guide note mentions the guide being very nice and helpful and that wishes were taken into account, and the experience stayed memorable because it felt tailored. In a private group, that sort of attention can make the whole evening feel smoother.
And yes, there’s a follow-up benefit. You get a don’t-stop-learning e-guidebook after the tour, so you can practice what you learned instead of letting it fade.
What the Private Group Format Means for Your Photos
This is a private group experience, priced per group up to 5 people. That smaller number matters at night, because good photo angles can get crowded quickly, and camera setups need space.
A private group also means the guide can adjust instruction speed. If you’re still trying to understand how exposure works, you can take your time. If you already grasp the basics, you can ask for more composition ideas and more targeted advice for your camera.
In practice, the value here is fewer bottlenecks. You are not waiting your turn while strangers shuffle your framing. That helps you test ideas faster, which is how you actually improve on a tripod shot.
Value for Money: What You Get for $282.87 per Group
The price is $282.87 per group up to 5 for a 2.5-hour session. At first glance it might look steep, but you’re not paying for a generic sightseeing walk. You’re paying for a pro guide who teaches low-light and long-exposure methods at the exact landmarks where you’ll use them.
Consider the cost of doing this solo. You’d still need to figure out tripod use, exposure basics, composition ideas, and landmark timing. Hiring a guide compresses all of that into one evening. Plus, the tour includes the best photo locations and compositions, so you spend less time searching and more time shooting.
The tripod hire option also affects value. If you show up without a tripod, renting it costs £30. If you already own one, your marginal cost is basically your participation fee.
For groups of friends, this format can be a good deal because you split the cost across up to five people while still getting individualized help.
Also worth mentioning: free cancellation up to 24 hours in advance is offered, which gives you a little breathing room if the weather plan changes.
Who Should Book This Night Photography Tour (and Who Might Skip)
You should book this tour if you want your night photos to improve fast and you like learning by doing. It’s a great fit for people who are curious but stuck, meaning you can take pictures, yet night shots never look as sharp or balanced as you hoped.
It’s also a smart choice if you’re coming with mixed gear, since it’s designed for DSLR, mirrorless, and smartphones. A group with different devices can still get something useful.
You might want to skip it if you already feel fully confident with night settings and composition. In that case, you may still enjoy the landmark variety, but the coaching could feel like something you already know.
Should You Book This Night Photography Tour?
I think it’s an easy yes if you want a focused night photo education, not just photos. The structure hits major landmarks, the guide provides expert coaching for low light and long exposure, and you get an e-guidebook after the tour so the learning doesn’t end when you pack up your tripod.
It’s also a good booking if you like the idea of a private group with room to set up shots. Small group size makes the evening more efficient, and it helps you get more direct help when you need it.
The only real “watch it” item is the tripod requirement. If you’re willing to bring one, or pay for the £30 hire, you’ll have a much better experience.
If you want to take home night photos that look like you meant them, book this one.
FAQ
How long is the Night Photography Tour in London?
The tour lasts about 2.5 hours.
How much does the tour cost?
The price is $282.87 per group for up to 5 people.
Where do we meet for the tour?
You meet outside Caffè Nero, Westminster station.
Where does the tour end?
The tour details say it ends at Tower Bridge, and the meeting information also notes it ends back at the meeting point. It is worth confirming the exact final stop with the guide on the day.
Which landmarks are included?
You’ll have photo stops at the London Eye, St Paul’s Cathedral, and Tower Bridge, plus you’ll walk across the Thames and explore the north and south banks.
Do I need a tripod?
Yes, you need a tripod. If you do not have one, you can hire a tripod for the duration of the tour for £30.
Is this tour suitable for smartphone cameras?
Yes. The tour is suitable for DSLRs, mirrorless cameras, and smartphones.
What photography help will the guide provide?
You get expert advice and personalized coaching focused on shooting in low light and using long exposure, plus composition tips for the best locations.
Is the guide English-speaking?
Yes. The live tour guide is English.
Is there anything to help you after the tour?
Yes. You receive a don’t-stop-learning e-guidebook after the tour.
More Evening Experiences in London
More Tours in London


More Tour Reviews in London

Not for you? Here's more nearby things to do in London we have reviewed
More London City Tours worth a look.
 ★ 4.6The London Eye Entry TicketTickets from $3935,875 guest reviews
 ★ 4.7From London: Harry Potter Warner Bros Studio TourTickets from $11726,588 guest reviews
Westminster to Greenwich River Thames CruiseTickets from $2222,836 guest reviews
Magical London: Harry Potter Guided Walking TourTickets from $2022,044 guest reviews
 ★ 4.6Madame Tussauds LondonTickets from $3620,915 guest reviews
 ★ 4.5Stonehenge, Windsor Castle, and Bath from LondonTickets from $11118,662 guest reviews
 ★ 4.7Warner Bros. Studio Tour with TransfersTickets from $14417,586 guest reviews
 ★ 4.7Tower Bridge Entry TicketTickets from $2115,560 guest reviews
Continue by place or experience