
REVIEW · PHOTOGRAPHY SESSIONS
Discover Photography
Camera settings finally make sense. In this 2.5-hour class, you learn the relationship between aperture and shutter speed with hands-on practice, then leave with a clearer way to control your shots. I also love the small group size (max 12), because you get real coaching instead of getting lost in a crowd, and instructors like Vehbi Koca and Pierre are praised for answering questions and encouraging experiments. One drawback to consider: you will need a DSLR or a compact camera with manual settings to get the most from the session.
This course is run through Westland Place Studios3 at 11 Westland Pl, London N1 7LP, and it uses a simple mobile ticket. You cover lenses, composition, depth of field, colour temperature and white balance, plus how to switch between auto, semi-automatic, and manual modes so you can actually use what you learn when you’re back out in London.
Key takeaways before you go
- Aperture and shutter speed, tied to real results instead of theory you forget
- Max 12 people so questions get answered on the spot
- Manual and semi-automatic modes explained for beginners
- Depth of field and exposure basics built around the exposure triangle
- Lenses, focal length, and perspective to help you see better compositions
- White balance and colour temperature so skin tones and skies look natural
What this “Discover Photography” class really does for beginners
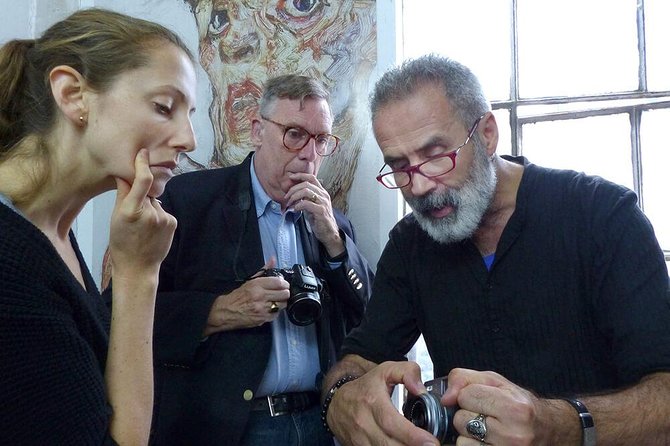
A beginner photography course can go two ways. It can be a slideshow of camera terms, or it can teach you how to make decisions with your settings. This one aims for the second option.
The big promise is learning your camera’s manual controls, not just pressing buttons. You’ll work through core building blocks like how to set exposure and how aperture, shutter speed, and ISO connect. That matters because most people do not fail at photography because they lack inspiration. They fail because the camera is changing settings automatically, and they cannot predict what the result will look like.
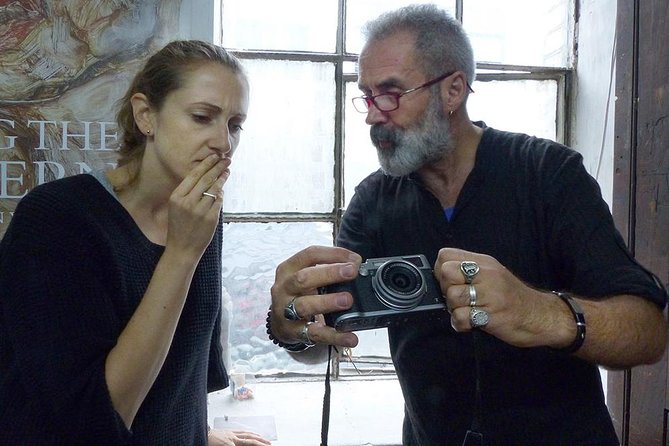
The format is also built for clarity. The group stays small, and the instruction comes from an award-winning photographer. In the past, instructors such as Vehbi Koca have been highlighted for explaining simply and for helping you experiment with your own camera, even if it is not the exact same model. Another instructor, Pierre, shows up in feedback for making settings click for people and for keeping everyone up with the pace.
You can also read our reviews of more photography tours in London
The exposure triangle lesson, translated into everyday choices
If you only remember one part of a beginner class, make it this: the exposure triangle is not random math. It is tradeoffs you can feel.
Aperture: control light and depth of field
You’ll learn how aperture affects the image, especially depth of field. In plain terms, aperture helps decide what looks sharp and what falls softly out of focus. That is the foundation for portraits, close-ups, and the “separate the subject from the background” look.
What makes this valuable is that you do not just memorize f-numbers. You learn the effect of changing aperture through a practical exercise that explores how aperture and shutter speed change photos. When you can see the cause-and-effect in front of you, you stop guessing later.
Shutter speed: control motion blur
You’ll also learn how shutter speed affects the image. That covers everything from freezing movement to allowing blur when motion is part of the story. London has plenty of moving subjects, from people walking to trains and buses, so this skill is immediately usable.
The practical exercise is key here. Shutter speed feels abstract until you try it, then it becomes obvious. You start asking better questions like, Do I want this person sharp as they move, or do I want a sense of motion?
ISO: manage brightness when light is not cooperating
The class includes the relationship between aperture, shutter speed, and ISO. That matters because ISO is the knob that usually gets used as a band-aid after you pick your shutter speed and aperture. When you understand the tradeoffs, you can stop blaming your camera for blurry or noisy shots and instead adjust deliberately.




Manual settings, semi-automatic modes, and when to use which
A lot of beginners hear the word manual and think it means never use auto. This course takes a smarter approach: you learn how to operate semi-automatic and manual modes, then decide which mode fits the situation.
Here is how that helps in real life. When the light is stable, like late morning indoors or a steady overcast day outdoors, you might prefer manual for consistency. When conditions change quickly, semi-automatic modes can help keep exposure from drifting while you still control the creative pieces like depth of field or motion blur.
You also learn how to switch between automatic and manual settings. That sounds basic, but it prevents a common problem: people get confused when their camera suddenly changes behavior. If you can intentionally switch modes, your photos stop looking inconsistent from shot to shot.
Lenses, focal length, and perspective that you can control
The course covers lenses, and it does not stop at the idea of “zoom in and out.” You’ll learn about focal length, angle of view, and perspective. This is where a class can really upgrade your eye.
Even without changing where you stand, focal length and perspective can change what the scene feels like:
- A wider angle can make a subject feel more dramatic in relation to the surroundings.
- A longer focal length can compress distance, which is handy for isolating details and layering depth.
If you’ve ever wondered why two photos of the same street look totally different, this is the section that helps explain it. You start to understand that composition is not only about where you point the camera. It is also about the lens and what that lens does to the scene.
Composition and depth of field, built around your camera’s strengths
Composition is included in the session, which is good. Beginners often focus only on exposure and forget that framing is the other half of photography.
You’ll work with composition concepts alongside depth of field, which is a practical pairing. Once you know how aperture changes background blur, you can use it to support your composition choices. For example, if you want your subject to stand out from a busy background, you have a tool for it. If you want more of the scene sharp, you know how to adjust.
The course also covers operating your camera in ways that help you create different effects, not just get one technically correct shot. That is what makes the learning feel creative instead of mechanical.
Colour temperature and white balance, so London looks real
London lighting can be tricky. It can be bright, then gray. It can warm up in the evening, then cool off in shade.
This class includes colour temperature and white balance, which is one of the most underrated beginner skills. If your images look too orange, too blue, or just off compared to what you remember, white balance is often the culprit.
Learning this early helps you stop fixing everything later in editing. You start getting closer at capture time, which saves time and makes it easier to keep a consistent look across a whole trip.
Where you meet and what the timing means for your learning
You meet at Westland Place Studios3, 11 Westland Pl, London N1 7LP. It is near public transportation, so you should not have to plan your whole route around getting there.
The session runs about 2 hours 30 minutes. That duration is important. It is long enough to learn concepts, try a practical exercise, and ask questions. It is also short enough that you likely will not cover everything you could learn over a full weekend course. So go in with the right expectation: this is a foundation course that helps you stop fumbling.
A small-group setting (max 12) supports that timing. In a larger group, you might get one quick check and then move on. Here, you have a better chance of staying with the lesson and getting adjustments while you practice.
Who this course is best for, and who might want something else
This course is designed for beginners, especially if you want to use manual settings without getting overwhelmed.
You’ll probably love it if:
- You can set manual on your camera (or want to learn how).
- You feel stuck on terms like aperture or shutter speed.
- You want a structured way to practice instead of random YouTube watching.
- You like learning in a small group with a coach who can answer questions.
You might consider another option if:
- You have only a phone camera and want a phone-only workflow. The tour info emphasizes DSLR or compact cameras with manual settings.
- You already shoot comfortably in manual and want deeper topics like advanced lighting setups or long exposure technique. This course focuses on the fundamentals and the exposure triangle, plus lenses, composition, and white balance.
Price and value for $95.80 in London
At $95.80 per person for about 2 hours 30 minutes, you are paying for three things: expert guidance, a small group limit, and a hands-on practical exercise.
In London, standalone camera advice can be expensive, and self-teaching can be slow. This price sits in a middle ground where you are not just buying information, you are buying feedback while you try the settings. That is often the difference between learning once and actually using it on your next walk around the city.
Also, the requirement that you bring a DSLR or compact with manual settings keeps the class targeted. You are not spending the time teaching basic buttons to everyone who cannot control exposure. For many beginners, that means faster progress.
What to bring so you leave feeling confident
The course is built around your camera’s ability to do manual controls. So bring:
- A DSLR, or a compact digital camera that supports manual settings (this is the main requirement).
- Your camera manual if you think it will help you find key menus quickly, since camera layouts differ.
- A charged battery and enough storage for practice.
If you show up ready to experiment, you will get more from the practical exercise. The instructors have been praised for encouraging experimentation and helping people no matter what camera they have, which suggests you will not feel stuck if you are unfamiliar with your own menu system. Still, you’ll get the most if your camera can actually change aperture, shutter speed, and ISO.
Should you book Discover Photography?
Book it if you want a clear starting point for manual settings and you learn best with coaching and practice in a small group. This is a good value option because it covers the stuff that directly affects your photos: exposure, depth of field, lenses, and white balance.
Skip it or look for a different class if you do not have a camera with manual controls, or if you are already comfortable running the exposure triangle and want more advanced techniques. Otherwise, this course is a strong way to turn your camera from a complicated box into a tool you can steer.
If you want your next London day to produce photos that look intentional, not accidental, this is the kind of session that pays off fast.
FAQ
Where is the meeting point for Discover Photography?
The class meets at Westland Place Studios3, 11 Westland Pl, London N1 7LP, UK.
How long is the Discover Photography course?
The duration is approximately 2 hours 30 minutes.
What does the course include?
You’ll cover lenses, composition, colour temperature and white balance, operating in semi-automatic and manual modes, depth of field, how aperture and shutter speed affect images, and focal length, angle of view, and perspective. There is also a practical exercise exploring the effects of aperture and shutter speed.
What camera do I need to get the most from it?
You will need a DSLR camera or a compact digital camera with manual settings.
How many people are in the group?
The course is capped at a maximum of 12 travelers.
What are the age requirements?
Minimum age is 18 years. Children must be accompanied by an adult, and both must have paid tickets.
What is the cancellation policy?
This experience is non-refundable and cannot be changed for any reason. If it is canceled because a minimum number of travelers is not met, you will be offered a different date or a full refund.
More Photography Tours in London
More Tour Reviews in London
Not for you? Here's more nearby things to do in London we have reviewed


More Photography Sessions worth a look.
 ★ 4.8Private Photoshoot with Video Clip OptionTickets from $161182 guest reviews
 ★ 5.0Professional Photoshoot in London PhotographerTickets from $305102 guest reviews
 ★ 5.0Private landmarks photoshoot for families and couplesTickets from $16692 guest reviews
 ★ 4.7Private Landmark Tour with Professional PhotographerTickets from $15691 guest reviews
 ★ 5.0Professional Private Photoshoot in LondonTickets from $10963 guest reviews
 ★ 4.530 Major London Attractions Walking Tour With PhotosTickets from $6751 guest reviews
 ★ 5.0Private Tour: Night Photography Tour in LondonTickets from $33748 guest reviews
 ★ 4.7London Customisable 30 minute photoshootTickets from $14845 guest reviews
Continue by place or experience